
~ Alaska Museum of Fancy Knots ~

~ Star Knots ~

~ Star Knot Key Fobs ~
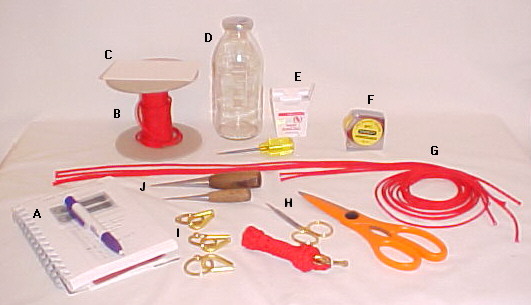
Diagram 1
To make the Star Knot Key Fob, you will need:
A. notebook
B. cord (3mm paracord)
C. white index card
D. bottle/bos'n mug
E. dental floss (waxed)
F. measuring tape
G. 3mm paracord
H. scissors
I. "thimble/keyring/bead"
J. Japanese Marlinespikes
Cut the 3mm paracord:
4 @ 50"
2 @ 35"
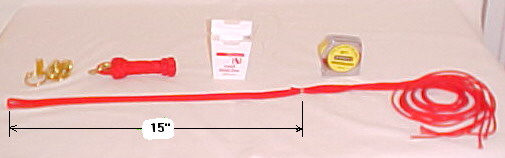
Diagram 2
The cords are tyed with dental floss at 15" from the ends of the 50" cords. I use half hitches and this binding has to be very secure! (Although 2 of the cords are melted, all 6 cords are held securely with the dental floss, so make sure this binding is extra secure!)...(all 6 ends will be even on the other end).
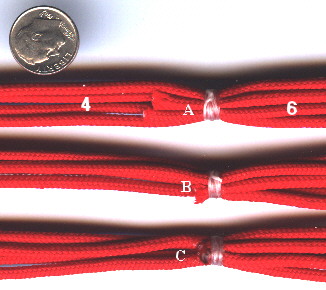
Diagram 3
The cords are tyed securely with dental floss:
A. Tyed
B. Cut close to the dental floss
C. Melted with a BIC lighter
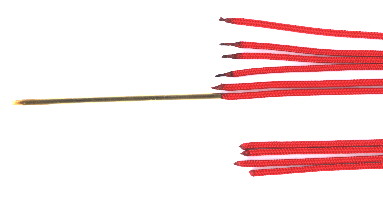
Diagram 4
The 6 ends are tapered using a BIC lighter and self-threaded using the needle. The other 4 ends are melted a little to keep from fraying.
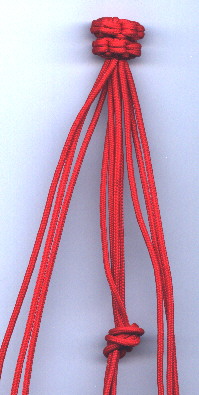
Diagram 5
Make the doubled Star Knot!
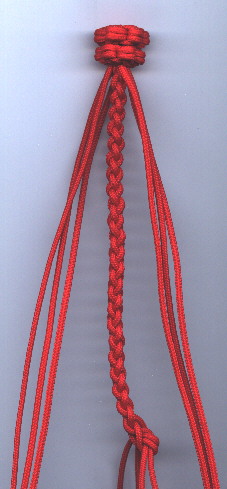
Diagram 6
Braid the 4 15" cords using the "4-strand Plait Braid".
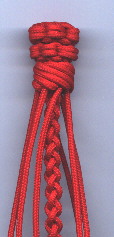
Diagram 7
Tye a Matthew Walker Knot. Tye the MWK fairly loose at this point, as you will be pushing 4 cords into it.
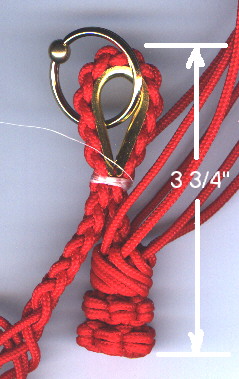
Diagram 8
Add the "thimble/keyring/bead" and it will lay naturally in the 4-strand Plait...using dental floss, secure the "thimble/keyring/bead" using half hitches. Your knot should be approximately 3 3/4" long. As you finish the knot, it will become approximately 4"(+-) long. The hitching has to be very secure! (Note that I left the dental floss attached because I add several more half hitches after I have unlaid the 4-strand Plait(next step)).
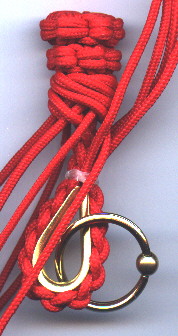
Diagram 9
Unlay the 4-strand Plait (and add some more half hitches with the dental floss for added security).
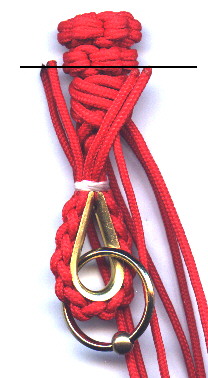
Diagram 10
Cut the 4 strands at approximately the middle of the bottom cord of the doubled Star Knot....melt the ends with a BIC lighter.
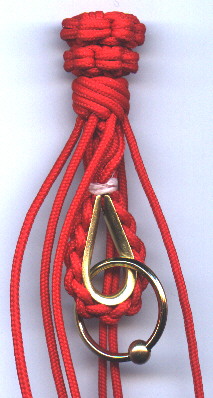
Diagram 11
The 4 short strands are pushed into the Matthew Walker Knot (symmetrically!). Tighten up the Matthew Walker Knot.
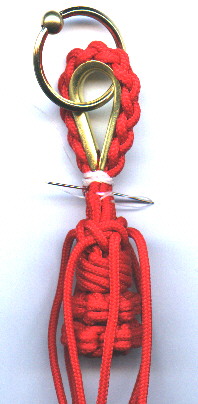
Diagram 12
Then start the crown hitching. Make the first crown a "single crown" knot...after that it is "over 2" crown hitching or "complex crown" hitching. I put a couple of crown knots on and then i sew the 4 loose cords(directly where the dental floss is) using a sewing needle and dental floss. This adds security as at this point there is nothing but some half hitches holding the "thimble/keyring/bead" on! I sew each cord a few times and it will hold no matter who tries to pull the knot apart later(and many have tried!!).
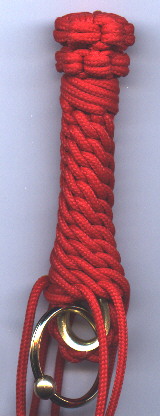
Diagram 13
Finish up with the "over 2" crown hitching. Add a 5-lead Footrope Knot.
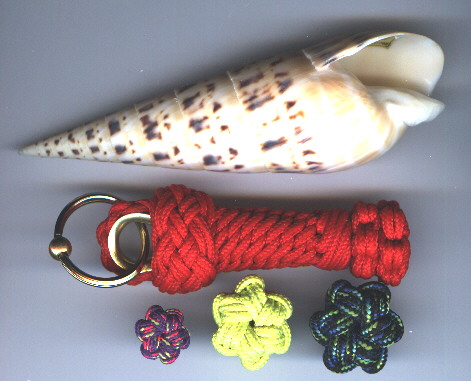
Diagram 14
~ All Done!! ~
**********

 BACK ~~~~~~~~~~~~ MAIN PAGE ~~~~~~~~~~~~ Next